簡易 X-Window 設定
本文已不再維護!請前往這裡查閱最新文章
最近更新日期:2003/02/12
X-Window的架構
  XFree86 的歷史演進與版本
  X server, X client 與 Window manager
  XFree86 的主要設定檔案
使用設定工具XFdrake, Xconfigurator
使用XFree86提供的工具設定:xf86cfg, xf86config
手動修改XFree86設定檔
啟動X-Window
更新顯示卡驅動程式範例:以Geforce2 MX 說明
本章習題練習

X-Window的架構
在Unix-Like包括Linux等作業底下的圖形界面通常被我們簡稱為X-Window囉,這個X-Window怎麼來的?他目前的版本是怎樣?還有,X-Window主要是主從架構的(Server, Client),那麼這些主從架構是怎麼回事呢?我們底下就來談一談這些東西吧!

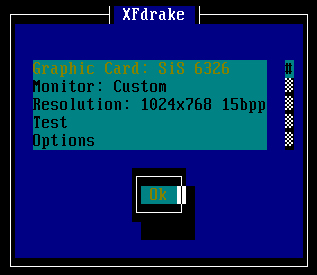
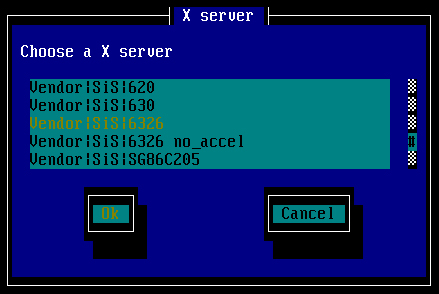
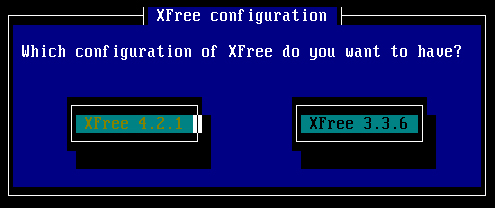
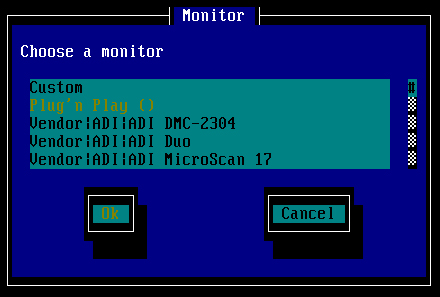
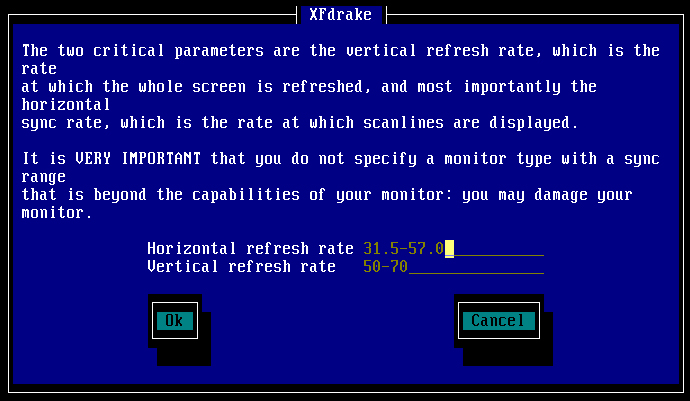
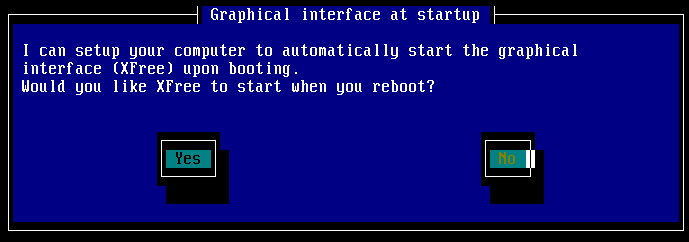
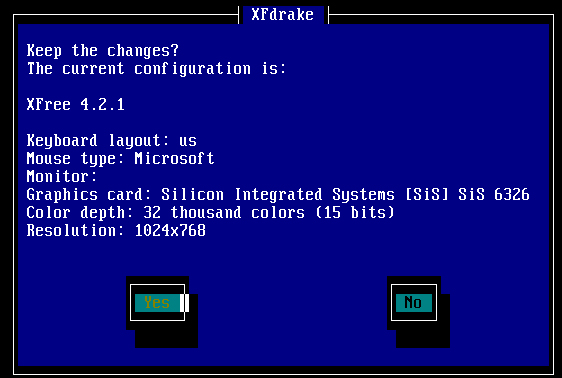
使用設定工具:XFdrake, Xconfigurator:
好了,如果你的X-Window本來就沒有問題,那麼底下的資料就可以不要看啦!但是,如果你的X-Window一直怪怪的,那麼底下的設定方式就得給他瞧一瞧!目前使用上面較為方便的,還是以各家distribution提供的小工具來設定我們的/etc/X11/XF86Config-4這個檔案較為方便,而設定的內容不外乎:
  1. 鍵盤的格式;
  2. 滑鼠的格式;
  3. 螢幕的格式,包含解析度、水平、垂直更新頻率等等;
  4. 顯示卡的主要驅動程式,也就是所謂的X server最主要的內容啦!
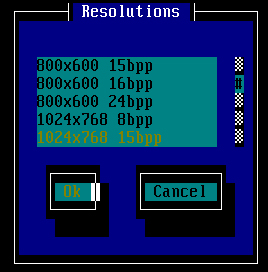
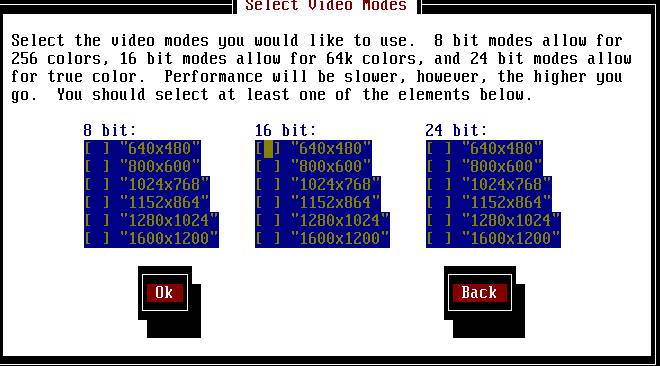
  5. 顯示的解析度:
上面那個顯示的解析度還得要瞭解一下,我們在設定螢幕的解析度時,指的是『我的螢幕能夠負荷的最高解析度』,而在第五項的顯示的解析度,是我們進入X-Window並且使用Window manager來操作主機之後,那個桌面的支援的解析度啦!因此,第三項螢幕的解析度當然就可以設定的比較高囉!
 
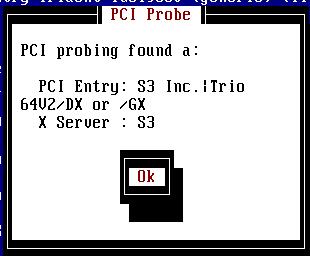
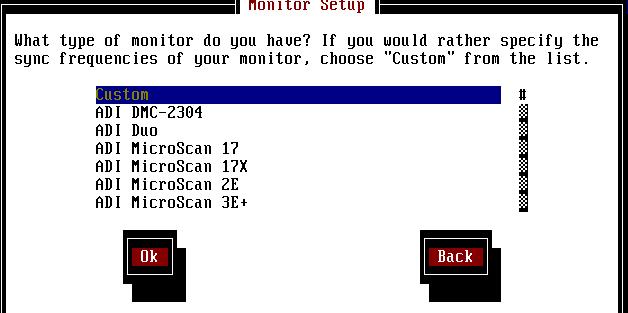
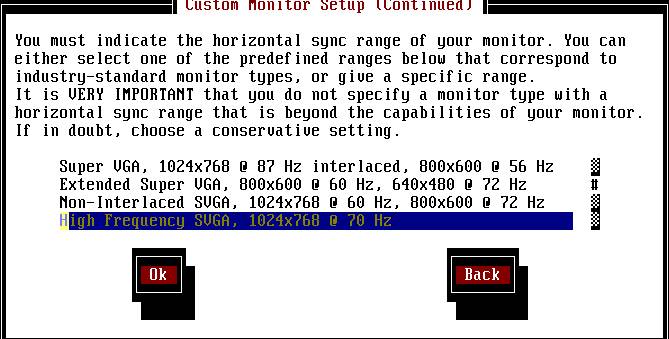
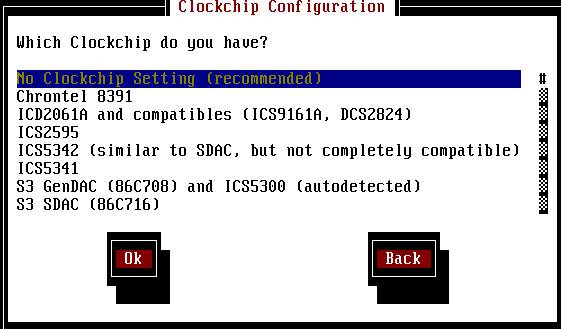
目前最流行的兩套Linux:Mandrake與Red Hat均提供不錯的軟體來設定XF86Config-4,那就是: 這兩個套件設定的項目幾乎都是一模一樣啦。好了,請記得備份你的XF86Config-4這個檔案吧。 很簡單吧,這就是使用工具軟體來設定的方法。底下我們來提一提,那麼正統的設定XFree86該怎麼玩?


使用XFree86提供的工具設定:xf86cfg, xf86config
基本上,XFree86 已經提供了兩支相當好用的程式來幫我們設定 XF86Config-4 了!那就是 xf86cfg 及 xf86config 這兩個!
 
那個 xf86cfg 會自動的偵測我們的主機資訊,並且直接將新的 XF86Config.new 檔案放置在設定者的家目錄之下,相當的方便!只要使用者在啟動 X-Window 之前,將自己家目錄的 XF86Config.new 複製到 /etc/X11/XF86Config-4 這個檔案,那麼就完成設定啦!但是,由於 xf86cfg 主要是自動幫我們捉取資料的,除非您使用 man xf86cfg 來查詢他的參數,否則常常無法捉到自己喜歡的模式!使用的方法是直接在指令列模式下,下達 xf86cfg 即可!
 
相對於 xf86cfg 的主動偵測資料,這個 xf86config 則顯的較為老態龍鍾,因為他的所有設定都需要使用者給予呢!包括鍵盤、滑鼠、螢幕、解析度等等的問題。不過,因為他都是經由使用者設定的,所以自然也就有辦法直接提供使用者一個喜好的環境設定囉!底下我們就針對 xf86config 來談一談吧!
 
[root @test root]# xf86config
Step 1: 準備備份與是否進行?
This program will create a basic XF86Config file, based on menu selections you make.
Before continuing with this program, make sure you know what video card
you have, and preferably also the chipset it uses and the amount of video
memory on your video card. SuperProbe may be able to help with this.
Press enter to continue, or ctrl-c to abort.   <==這裡按下Enter開始設定

Step 2: 設定滑鼠:
First specify a mouse protocol type. Choose one from the following list:
 1.  Microsoft compatible (2-button protocol)
 2.  Mouse Systems (3-button protocol)
 3.  Bus Mouse
 4.  PS/2 Mouse
 5.  Logitech Mouse (serial, old type, Logitech protocol)
 6.  Logitech MouseMan (Microsoft compatible)
 7.  MM Series
 8.  MM HitTablet
 9.  Microsoft IntelliMouse
Enter a protocol number: 4  <==主要是2或4,目前大多使用ps/2滑鼠,所以選4就對了!

Do you want to enable Emulate3Buttons? n <==是否模擬三鍵?我們已經是三鍵,當然不模擬!

Now give the full device name that the mouse is connected to, for example
/dev/tty00. Just pressing enter will use the default, /dev/mouse.
Mouse device:  <==這裡要設定滑鼠的裝置代號,通常使用預設值即可,所以按下Enter!

Step 3: 設定鍵盤格式:
  1  Generic 101-key PC
  2  Generic 102-key (Intl) PC
  3  Generic 104-key PC
  4  Generic 105-key (Intl) PC
  5  Dell 101-key PC
  6  Everex STEPnote
  7  Keytronic FlexPro
  8  Microsoft Natural
Enter a number to choose the keyboard.
<==選擇鍵盤的形式,如果不知道你的鍵盤格式,選擇 1 或 3 即可!

  1  U.S. English
  2  U.S. English w/ ISO9995-3
  3  U.S. English w/ deadkeys
  4  Albanian
Enter a number to choose the country.
Press enter for the next page
1   <==選擇鍵盤按鍵,我們鍵盤上面有的是英文呀!所以當然選擇 1 英文按鍵!

Please enter a variant name for 'us' layout. Or just press enter
for default variant
  <==選擇這個鍵盤的名稱,預設稱為 us ,不用搞特殊,Enter即可!

Please answer the following question with either 'y' or 'n'.
Do you want to select additional XKB options (group switcher,
group indicator, etc.)? n  <==是否需要額外的XKB選項,不需要啦!按 n !

Step 4:設定螢幕
Now we want to set the specifications of the monitor. 
The valid range for horizontal sync and vertical sync should be documented
in the manual of your monitor. If in doubt, check the monitor database
/usr/X11R6/lib/X11/doc/Monitors to see if your monitor is there.
Press enter to continue, or ctrl-c to abort.  <==準備設定螢幕,按Enter開始

    hsync in kHz; monitor type with characteristic modes
 1  31.5; Standard VGA, 640x480 @ 60 Hz
 2  31.5 - 35.1; Super VGA, 800x600 @ 56 Hz
 3  31.5, 35.5; 8514 Compatible, 1024x768 @ 87 Hz interlaced (no 800x600)
 4  31.5, 35.15, 35.5; Super VGA, 1024x768 @ 87 Hz interlaced, 800x600 @ 56 Hz
 5  31.5 - 37.9; Extended Super VGA, 800x600 @ 60 Hz, 640x480 @ 72 Hz
 6  31.5 - 48.5; Non-Interlaced SVGA, 1024x768 @ 60 Hz, 800x600 @ 72 Hz
 7  31.5 - 57.0; High Frequency SVGA, 1024x768 @ 70 Hz
 8  31.5 - 64.3; Monitor that can do 1280x1024 @ 60 Hz
 9  31.5 - 79.0; Monitor that can do 1280x1024 @ 74 Hz
10  31.5 - 82.0; Monitor that can do 1280x1024 @ 76 Hz
11  Enter your own horizontal sync range
Enter your choice (1-11): 7 <==目前的螢幕選擇 7 應該都吃的下啦!
當然,如果你的螢幕比較好,可以考慮選擇 8~10 的選擇!

the number that counts is the high one (e.g. 87 Hz rather than 43 Hz).
 1  50-70
 2  50-90
 3  50-100
 4  40-150
 5  Enter your own vertical sync range
Enter your choice: 2  <==目前螢幕選擇 2 也應該都沒有問題啦!

You must now enter a few identification/description strings, namely an
identifier, a vendor name, and a model name. Just pressing enter will fill
in default names.
The strings are free-form, spaces are allowed.
Enter an identifier for your monitor definition: MyMonitor<==這裡要寫一下你的螢幕的代號,
隨便寫沒有關係啦!因為這個是在XF86Config裡面的代號而已!

Step 5: 設定顯示卡
Do you want to look at the card database? y <==是否要選擇顯示卡?當然是要囉!

468  SiS 5597                                          SiS5597
469  SiS 5598                                          SIS5598
470  SiS 620                                           SIS620
471  SiS 6326                                          SiS6326
472  SiS SG86C201                                      SIS86C201
Enter a number to choose the corresponding card definition.
Press enter for the next page, q to continue configuration.
471<==這裡接著下來會讓你選擇你的顯示卡資料,由於我們的資料庫相當龐大,所以
      如果該頁沒有你要的資料時,可以按下Enter到下一頁去選擇!那麼如果你的廠商
      是比較小牌的怎麼辦?沒關係,果真如此,那麼選擇不同廠商但是同樣晶片的
      資料就可以了!由於我是使用Sis 6326,所以就選擇471這個號碼囉!

Your selected card definition:
Identifier: SiS 6326
Chipset:    SiS6326
Driver:     sis
Do NOT probe clocks or use any Clocks line.
Press enter to continue, or ctrl-c to abort.  <==這裡再按Enter即可!

How much video memory do you have on your video card:
 1  256K
 2  512K
 3  1024K
 4  2048K
 5  4096K
 6  Other
Enter your choice: 6 <==設定你的顯示卡記憶體,目前的主流已經提升到 64MB了,
                        所以自然要選擇 6 來自定了!記得 RAM 的算法:
                        32M = 32*1024= 32768K 才對喔!

Amount of video memory in Kbytes: 1024 <==我的卡只有 1M 而已….

The strings are free-form, spaces are allowed.
Enter an identifier for your video card definition:  <==這裡按下 Enter 使用預設值即可!

Step 6:設定螢幕解析度:
"640x480" "800x600" "1024x768" for 8-bit
"640x480" "800x600" for 16-bit
"640x480" for 24-bit

Modes that cannot be supported due to monitor or clock constraints will
be automatically skipped by the server.

 1  Change the modes for 8-bit (256 colors)
 2  Change the modes for 16-bit (32K/64K colors)
 3  Change the modes for 24-bit (24-bit color)
 4  The modes are OK, continue.

Enter your choice: <==預設的情況下會有上面的那些模式,那麼我通常喜歡一種模式而已,
                         所以就按下 3 來修改該模式,設定為我喜歡的 1024x768 那個模式。

Select modes from the following list:
 1  "640x400"
 2  "640x480"
 3  "800x600"
 4  "1024x768"
 5  "1280x1024"
 6  "320x200"
 7  "320x240"
 8  "400x300"
 9  "1152x864"
 a  "1600x1200"
 b  "1800x1400"
 c  "512x384"
Please type the digits corresponding to the modes that you want to select.
For example, 432 selects "1024x768" "800x600" "640x480", with a
default mode of 1024x768.

Which modes? <==選擇我要的呦!

Please answer the following question with either 'y' or 'n'.
Do you want a virtual screen that is larger than the physical screen? n
上面的設定在說明,是否需要虛擬桌面?我才不要呢!所以選擇 n 囉!

 1  Change the modes for 8-bit (256 colors)
 2  Change the modes for 16-bit (32K/64K colors)
 3  Change the modes for 24-bit (24-bit color)
 4  The modes are OK, continue.

Enter your choice:  4  <==這樣就 OK 了!

Please specify which color depth you want to use by default:

  1  1 bit (monochrome)
  2  4 bits (16 colors)
  3  8 bits (256 colors)
  4  16 bits (65536 colors)
  5  24 bits (16 million colors)
Enter a number to choose the default depth.
<==預設是哪一個色彩度登入呢?選擇你要的喔!我要的是 5 那個色彩度!

Step 7: 寫入設定檔
Shall I write it to /etc/X11/XF86Config? y <==勇敢一點!給他 y 寫入吧!反正已經備份了!

 
這樣就設定完成了,但是比較麻煩的是,這個指令在設定XF86Config,所以你必需將他複製成為XF86Config-4才可以呢!然後就可以測試一下X-Window是否成功囉!

手動修改XFree86設定檔
好了,既然知道前面幾個咚咚都是在設定XF86Config-4這個檔案,那麼我們豈不是也可以自行去修改這個檔案呢?說的好!沒錯!所以我們就來修修改改這個檔案吧!首先,這個檔案裡面將很多的段落分成這種模樣:
 
Section “section name”
……..
……..
EndSection
 
開頭由 Section 接著該段落的內容項目,然後結束以 EndSection 來結束,我們直接在檔案內容進行說明吧!請參考一下底下的內容囉:
 
[root @test X11]# vi /etc/X11/XF86Config-4
Section "Module"
        Load  "dbe"
        Load  "dri"
        Load  "extmod"
        Load  "glx"
        Load  "record"
        Load  "xie"
        Load  "freetype"
        Load  "type1"
        Load "v4l"
EndSection
上面的資料在載入驅動X-Window的時候,需要的模組項目!通常這些項目都給他載入進去吧!另外,模組的資料可以在/usr/X11R6/lib/modules這個目錄中找到!

Section "Device"
        Identifier  "Card0"
        Driver      "nv"
        VendorName  "NVidia"
        BoardName   "GeForce2 MX"
        BusID       "PCI:1:0:0"
        Option "X-KXCONFIG-VideoRam" "32768"
        Option "X-KXCONFIG-MaxClock" "350"
EndSection
這個項目在設定你的顯示卡驅動程式!以我的卡為例,這個例子中,使用的是 Geforce 2 MX,
所以當然就是使用 nv 這個預設的 Nvidia 驅動程式啦!還有Option裡面的VideoRam設定的是顯示卡記憶體容量,記得填對!至於其他的項目就沒有這麼重要!

Section "Files"
        RgbPath "/usr/X11R6/lib/X11/rgb"
        FontPath "/usr/X11R6/lib/X11/fonts/75dpi:unscaled"
        FontPath "/usr/X11R6/lib/X11/fonts/misc:unscaled"
        FontPath "/usr/X11R6/lib/X11/fonts/TrueType"
        FontPath "/usr/X11R6/lib/X11/fonts/Type1"
        FontPath "/usr/X11R6/lib/X11/fonts/Speedo"
        FontPath "/usr/X11R6/lib/X11/fonts/ghostscript"
EndSection
這個項目在設定字型與顏色,那個RgbPath是設定色彩,而FontPath則是設定字型的地方!
這裡告訴我們另一個資訊,那就是字型通常是擺在/usr/X11R6/lib/X11/fonts裡面喔!

Section "ServerFlags"
        Option "AllowMouseOpenFail" “false”
EndSection
這裡可以設定X-Window的另一個整體化參數!上面那個 AllowMouseOpenFail 的設定中,
若設定為 “false” 那麼沒有找到並驅動滑鼠,就不能登入X-Window囉!

Section "InputDevice"
        Driver          "keyboard"
        Identifier      "keyboard"
        Option          "XkbRules"      "xfree86"
        Option          "XkbModel"      "pc104"
        Option          "XkbLayout"     "us_group3"
EndSection
Section "InputDevice"
        Driver          "mouse"
        Identifier      "mouse"
        Option          "Protocol"      "IMPS/2"
        Option          "Device"        "/dev/psaux"
        Option "ZAxisMapping"  "4 5"
EndSection
這個是在設定周邊輸入介面,有鍵盤及滑鼠兩種設定,注意上面黑體的地方,keyboard設定的是鍵盤的格式(XkbModel與 XkbLayout),而滑鼠則是設定介面(Protocol)較為重要!

Section "ServerLayout"
        Identifier      "Default layout"
        Screen          0 "Screen0" 0 0
        InputDevice     "mouse" "CorePointer"
        InputDevice     "usbmice" "SendCoreEvents"
        InputDevice     "keyboard" "CoreKeyboard"
EndSection
這個地方在設定整個畫面的輸出呢!重點在 Screen 那個項目的設定喔!那個 0 0 指的是桌面左上角為 0 0 的意思!

Section "Monitor"
        Identifier "Generic Monitor"
        VendorName "Typical Monitors"
        ModelName "1280x1024, 60Hz"
        HorizSync 31-64
        VertRefresh 50-90
        ModeLine "1024x768/70Hz" 75    1024 1048 1184 1328   768  771  777  806 -HSync -VSync
        ModeLine "640x480" 25.175 640 664 760 800 480 491 493 525
EndSection
這個項目則是設定螢幕的細項,包括解析度、更新頻率等等的設定值喔!

Section "Screen"
    Identifier  "Screen0"
    Device      "Card0"
    Monitor     "Generic Monitor"
    DefaultDepth 16
    Subsection "Display"
        Depth       32
        Modes "1024x768/70Hz" "640x480"
                Virtual 0 0
    EndSubsection
    Subsection "Display"
        Depth       24
        Modes "1024x768/70Hz" "640x480"
                Virtual 0 0
    EndSubsection
    Subsection "Display"
        Depth       8
        Modes "1024x768/70Hz" "640x480"
                Virtual 0 0
    EndSubsection
    Subsection "Display"
        Depth       16
        Modes "1024x768/70Hz"
                Virtual 0 0
    EndSubsection
EndSection
重點來了!這個就是設定你進入X-Window的時候,顯示的解析度囉!預設有支援的項目都會寫進來,但是,像比較龜毛的我,就是不喜歡有這麼多的項目存在,所以我可以將上面的資料,只剩下粗體字,其他的都刪除,那麼進入X-Window就只有一種顯示模式!比較方便啦!當然囉,你也可以藉由修改DefaultDepth那個項目來控制登入X-Window時的設定值囉!

 
這樣就設定完成啦!而如果你曾經選錯了『虛擬桌面,Virtual desktop』時,那麼就修改Section Screen 那個項目,將裡面的 Virtual 改成 0 0 即可囉!一般而言,我們在設定X-Window時,通常會先以各家Linux distribution提供的軟體來設定,如果不能成功,就改以xf86cfg來自動設定,還不能成功,就以xf86config來設定,再不成功,唉∼只好使用手動的方式修改設定檔囉!

啟動X-Window
好了,設定好了XF86Config-4之後,自然就是要啟動X-Window試試看囉!那麼該如何啟動X-Window呢?如果在開機流程簡介那一篇有仔細的瞧過的話,應該會知道,我們的開機進入模式有多種,但是基本上正常登入則有run-level 3的文字介面登入及run-level 5的圖形介面登入!如果是run-level 5的話,那麼表示您目前應該已經是在X-Window的環境下了,如果是在run-level 3要轉到X-Window的畫面下,那麼就直接給他:
startx
就可以啦!這個時候就會主動的來將我們剛剛設定的內容給他驅動看看,如果可以的話,自然就會進入視窗桌面囉!如果不能進入,再次的給他設定吧! ^_^

更新顯示卡驅動程式範例:以Geforce2 MX 說明
那麼萬一我的顯示卡並不被我的XFree86所支援呢?例如最新的Geforce4這些晶片組的顯示卡?沒有關係,能不能驅動硬體是跟硬體發展的廠商有關係的,所以只要硬體開發商能夠提供驅動程式的話,那麼自然就可以沒有問題的給他驅動囉!底下我們以目前最常見的Nvidia的顯示卡來進行說明,讓大家瞭解一下如何更新這個驅動程式吧!

本章習題練習 ( 要看答案請將滑鼠移動到『答:』底下的空白處,按下左鍵圈選空白處即可察看 )

2003/02/12:第一次完成